Release notes v0.5.97 (Stripe, Inventory promotions)
Jan 28, 2026
Stripe Integration
Users with permission to manage the company can set up Stripe integration and include a payment link in invoices, making it easier to collect payments.
To set it up, go to Settings > Integrations > Stripe > Connect and connect your Stripe account (or create a new one).
You need to configure the following Chart of Accounts:
Stripe Clearing Account – This is the account that temporarily receives the money. It should be an intermediary account (not your bank). When Stripe pays out to your bank, you should create a manual journal entry to move the money from the Stripe account to your bank account so you can reconcile it.
This account should clear to $0 once all Stripe payments are paid out.Stripe Fees Account – This account is used for Stripe fees.
Example: A customer pays $1000, Stripe charges a $30 fee. The entries will be:Credit A/R $1000
Debit Stripe Clearing $970
Debit Stripe Fees $30 (typically an expense account)
If Stripe is configured, every invoice has a checkbox to generate a payment link + QR code.
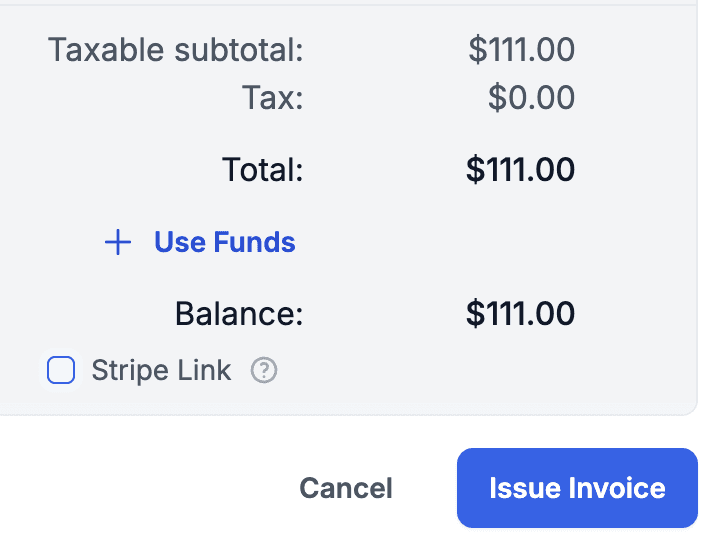

If you want this enabled by default for certain projects or customers, go to Stripe Settings > Payment Links.
Stripe provides information about the payment type used by the customer. This can be mapped to a Stonify payment method via Payment Method Mapping. This is optional, but if configured, automatically created payments will have the payment type set.
The Payment Intents tab in Settings shows all Stripe payments. If Stripe recorded a payment but it wasn’t synced, you can find it here and manually link it in the History tab.
Inventory Promotions
Added the ability to run promotions for your Live Inventory. This lets you create time-limited deals or highlight special products.
To activate this, go to Settings > Inventory > Live Inventory Promotions.
You can create promotions for specific products or individual slabs, choose a color, set a promotion name, and define the promotion period.

Users viewing Live Inventory will see these promotions and can filter by them.
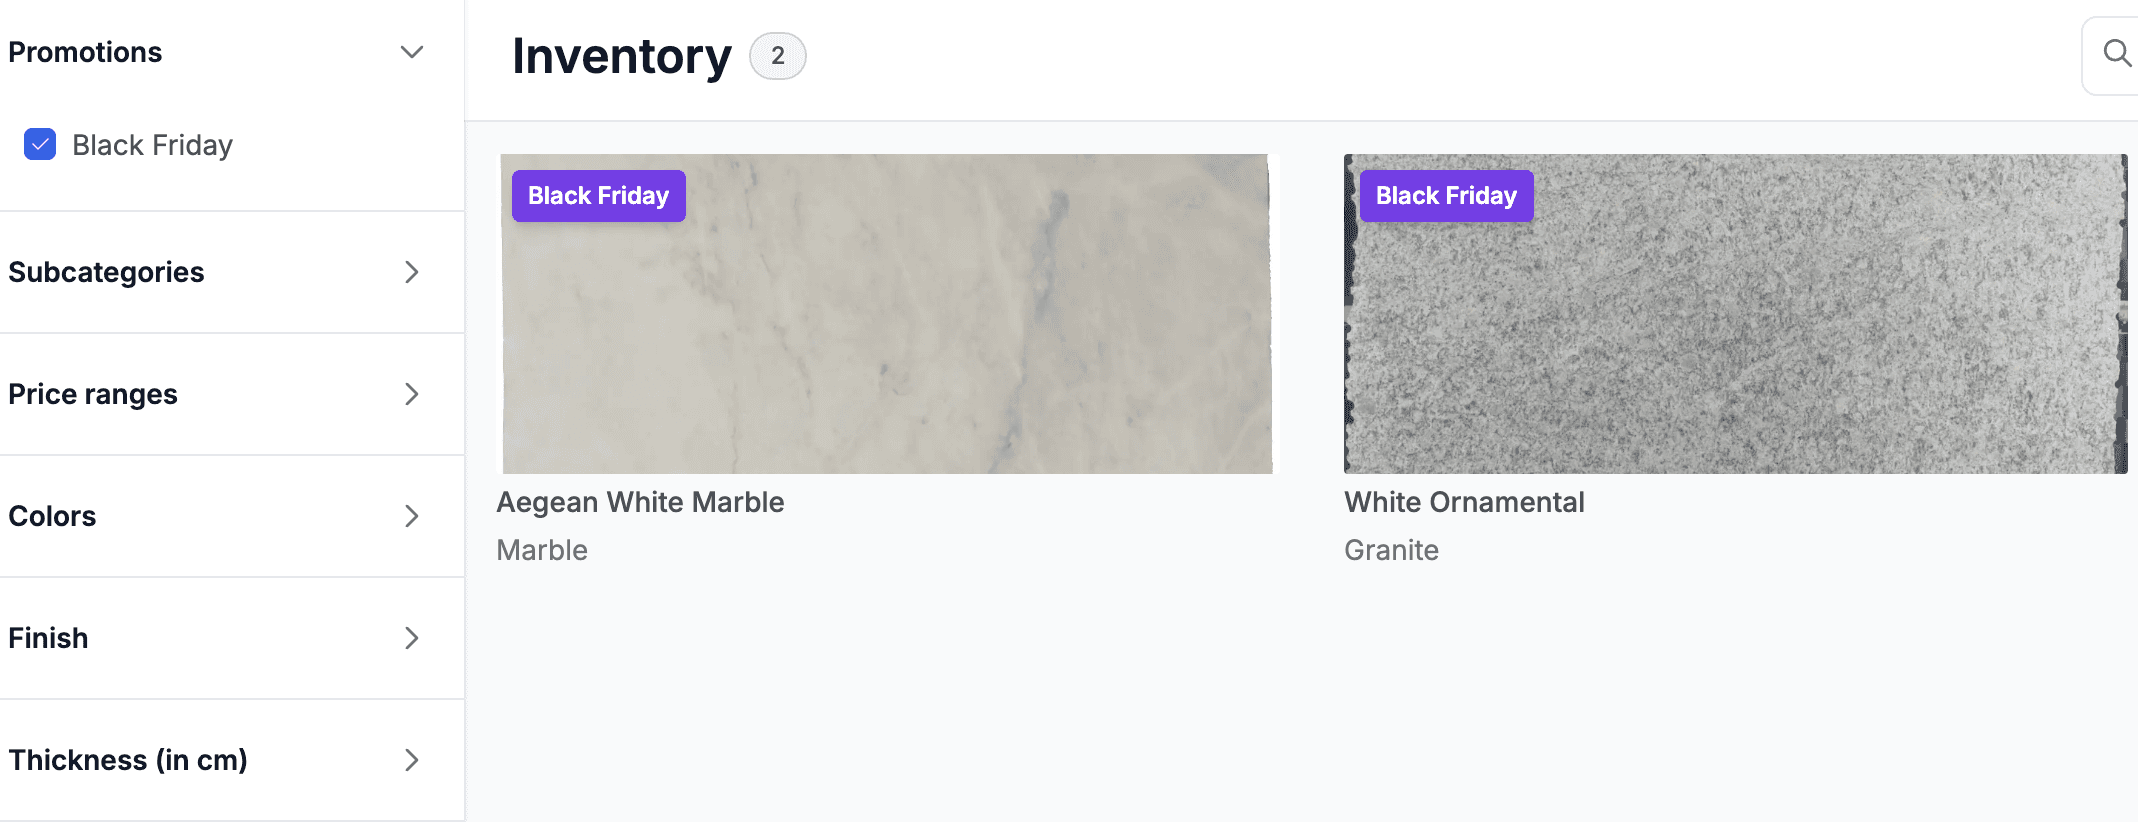
Promotions can also be added directly from Product Detail—either for the whole product via the Actions menu or for specific slabs using bulk actions.

Filters
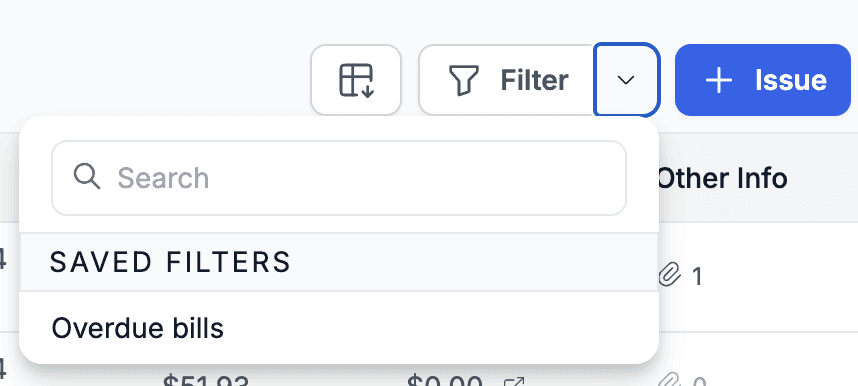
Filter buttons now allow you to name and save filters on your device. This makes it easy to reuse filters you use often.
We’re rolling this out first for Reports and Financial Documents, but most filters will support this soon.To save a filter, open the filter and click Save Filter.
To use a saved filter, click the dropdown next to the filter and select the one you want.
Leads
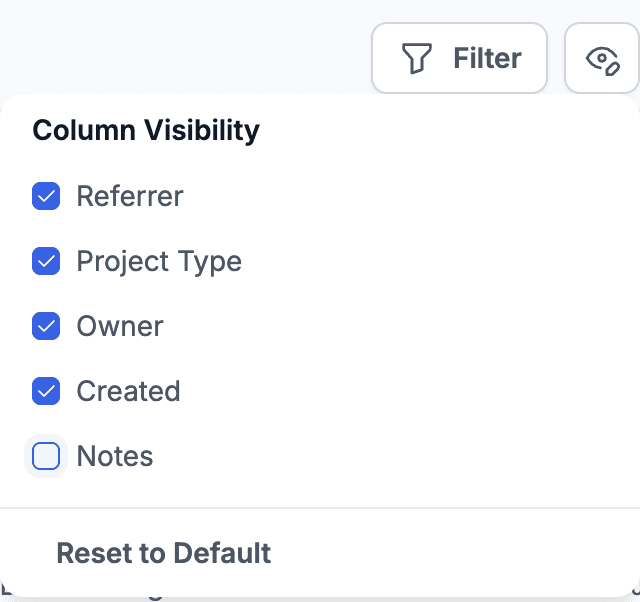
You can enable showing notes in the Leads table using the visibility button.
Financial Documents
You can now see history of changes for financial documents. Click the three-dots menu and choose History.
Purchase Orders
Products are now searchable by SKU. This makes ordering easier when you want to search by the supplier SKU instead of your internal product name.
More Notes
Release notes v0.6.0 (Vein matching in Drawing)
Feb 18, 2026
Release notes v0.5.99 (Vendor export, Saved filters across the app)
Feb 11, 2026
Release notes v0.5.98 (Drawing layout, Export products, Audit improvements)
Feb 4, 2026
Release notes v0.5.96 (Relative date filter)
Jan 20, 2026
Release notes v0.5.95 (Cost & Profit, Margin Calculator, Speed Label)
Jan 14, 2026
Release notes v0.5.94
Jan 5, 2026